Stuffed Zucchini Blossoms

What!? Now I’ve got you eating FLOWERS?!

Yep, Thats right, because they are AMAZING!

zucchini-flowers-picture-1-of-1.jpg

Known in Italy as ‘fiori di zucca’, Stuffed zucchini flowers are one of Italy's most graceful and elegant street foods. The soft filling is enwrapped and protected by a deliciously crisp outer surface which, when bitten into, reveals a centre of authentic, heavenly flavour!

My recipe is simple, prepared similarly to a jalapeño popper, and is a great launching point for your favourite variation. You can try goat cheese, traditional ricotta, sausage, rice, any herb like basil, dill, parsley, cilantro….

Make them spicy, savoury or sweet!

These Italian Stuffed Zucchini Flowers can be served as a side dish or even an appetizer, believe me once you try these there will be no going back.  You will be searching every summer more than once I am sure for these flowers.

Zucchini blossoms must be picked in the early morning, when they are fully open; by mid-morning they will already be closed tight.  Pick them gently off of the zucchini plant, mine still have the baby fruit attached and, using a spoon, carefully remove and discard the inner stem.  You can store them for a few days in the refrigerator, but keep in mind that the fresher they are, the better they are; they do not keep for longer than 2 – 3 days.  In order to store them, stack them together with paper or cotton towel and place them in a solid, airtight container in the fridge.

IMG_4468.jpg

Simple Stuffed Zucchini Blossoms

Makes 12 Appetizers

Ingredients: Filling

  • 12 MurrayHill Zucchini Flowers

  • 125g cream cheese, softened

  • 50g goat cheese

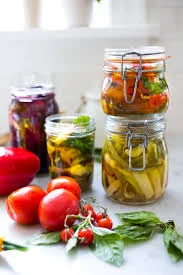
  • 1 Tbsp pickled hot peppers, finely chopped

  • Salt and pepper

Batter:

  • 1 1/4 cups of all purpose flour

  • 1 tsp salt

  • 1 can of beer

  • oil for frying

IMG_4471.jpg

*Quick Tip: Spoon the cheese into the corner of a plastic sandwich or Ziploc bag. Snip 1/2 inch off the corner, and use this as a makeshift piping bag to gently squeeze the filling into each flower.

Fill each blossom with a Tbsp of filling and gently twist the ends of the petals to close off the end.

IMG_4470.jpg

Dip in prepared batter and fry in 1” of oil or in a fryer until crispy and golden then lift them out and drain on paper towels. 

Serve warm with a quick homemade dip of sour cream and dill or a tomato based sauce depending on your choice of filling.

The best part?, the look on everyone’s faces when they discover how delicious they are!

Remember, this is just the beginning! The possibilities are endless.

Let your imagination roll!


What our little calf taught me -

Struggle, adversity, resilience and hope affects us all every day.

Farming is a constant reminder of this. The inspiration and strength that’s needed comes from all kinds of places.

I want to introduce our heifer calf Glimmer. Our Glimmer of hope.

IMG_3914.jpg

Glimmer is our first heifer (girl) calf born on our farm since starting our new herd. We bought her mama from breeders in Saskatchewan and had her shipped here last fall so she could have her baby here. With an exciting show season ahead we had high hopes for this pair.

Endear (mama) travelled well, man was she just GORGEOUS!, and settled right in with our little herd here as winter marched on.


On the morning of January 16th, Endear went into labour and we were on high alert as expectant parents and after 30 min or so we decided to give Mama a helping hand as we most often do for first-time calvers.


I wont get into details but the next 2 hours became complicated and scary as Baby was waaaay bigger than she should have been. Her Sire was chosen especially because he threw small babies for first time mothers so this was totally unexpected. Endear was tired, she was up, then collapsed and layed down, and eventually we managed to pull the big calf out without damaging Mum.  Whew!

And we had our first baby girl on the farm!

Unbeknownst to us, the calf sustained some nerve damage to her back legs and didn’t get up to suck so when we checked on her later she was cold and hungry.

We milked Endear and fed baby and brought her in the house by toboggan where we slowly warmed her with blankets and a hair dryer.

Once back in the barn donning her new calf blanket she stayed in the warm glow of the heat lamp.

So began the next four days of calf duty.

Glim in house

With help from us to get up every 4 hours and support of a straw bale, our little girl finally learned how to nurse in the wee hours of the morning on day 2.

That morning she earned her name Glimmer.

Because she was. Our Glimmer of hope.

glim heat lamp
glimmer 4G

By the fourth day of helping her stand she had learned how to get up on her own and we had experienced our first real calving lesson about resilience and determination.


Today, over 4 months and a few vet and chiropractor visits later, Glimmer is a happy, healthy heifer calf with a gimpy leg that doesn’t slow her down one bit.


She is teaching her mama how to be a great cow, and teaching us that where there is a will there is a way. When I stop and watch this little calf race around with her pen mates I am inspired and thankful for the opportunity to do what we do every day.

This is one experience that has taught me that resilience, strength, and faith can get you through one heck of a lot!

Thanks girl for being my Glimmer of Hope!


Inspiration is all around us if we take the time to look


Keep the ‘Fresh’ in Farm-Fresh - minus the Plastic

We struggle to eat fresh, unprocessed food amidst work, ball games, and music lessons. The worst is having to toss your efforts out in a slimy, stinky, plastic bag filled with you think was mesclun mix!

You’ve made the effort to buy the freshest for your family, when you purchased foods that were picked locally and being sold the same day as being picked. You are far more likely to have that food last longer than another piece of produce that had to travel half way around the world before even getting to your supermarket.

Now let me help you make that freshness last - Without the Plastic!

Remember: Two basic rules

  1. Produce needs to Breathe! Excess moisture is the enemy of fresh fruits and veggies

  2. Separate fruit and vegetables and keep bananas away from everything.

*make sure to unwrap the veggies from the plastic and remove any binding bands before the storage process.

storing+lettuce

That bag of lettuce got buried again! I know, I’m busy too and it happens all the time, the next thing you know its all slimy!

Ideally, when you get your lettuce home, rinse and dry the leaves, either by hand or in a salad spinner, making sure to remove any dead or wilted leaves.

Enter cotton pillowcase, tea towel or cloth! in a pinch use paper towels

Once they're dry, place in a thin layer on top of a towel. Gently roll the towel as if you're making a jelly roll cake, except the cake is the towel and the filling is the greens.

Would not recommend taking a bite here! Store your roll in the crisper drawer. This should be done with all greens including beet and radish tops.


Asparagus

Should be stored in the refrigerator, wrapped with a moist paper towel or you can stand them up in a glass of cold water wrapped with a damp paper towel.

Rhubarb

Yep, it's a vegetable! And since its growing season is so short, freezing it is a great way to ensure scrumptious homemade pies all year long. If you're planning to use within the week, you can store cut rhubarb in the fridge wrapped in a damp towel or in a container that breathes.

Re-purpose your odd china!

Re-purpose your odd china!

Basil

Storage in the refrigerator can brown the leaves and speed up basil’s demise. Store it at room temperature with stems placed in a jar of water. Large bunches can double as a centerpiece.

Radishes 

You had great intentions to try this awesome dip (Previous Blog Post) on the weekend but now its Wednesday and the radishes are squishy and the greens are gross. 

Green tops draw moisture out of root vegetables. Remove them and store separately as you would lettuce. Store the radishes in a glass container with water (change after a few days) covered with a small cloth or wrapped in a damp cloth in the crisper drawer for up to 10 days.

While we are improving our Storage game, let’s ditch the plastic as much as possible!

images.jpeg

Mason Jars, Glass Containers and Clean Cotton Cloths are my essential storage tools and are easily found in everyone’s home.

A product I am anxious to try is Bee's Wrap for cut veggies and fruit.

Make the most of your Farm-Fresh veggies and enjoy your efforts for weeks!

Warm Cheesy Radish Dip


The first vegetable harvested from the garden is something so special.

radish in hand

We plan all through the frigid winter,

eagerly plant as soon as we can get our fingers in the frozen dirt and we WAIT…….. and wait… We go and check, dig up a seed to see if its even still there, Yep, and we wait some more!

The anticipation kills me every year!

But two days ago, I did it. I pulled a tiny little radish. Ok it was small - like a marble - but I admired it, wiped the black soil off with my hands as best I could and bit into it right there standing in the garden. It was heaven. Like it is every year.

And you know what? I’m not even a huge fan of radishes! Yes I will eat them raw with some salt or off a vegetable platter but they make me burpey.

So to honour the harbringer of gardening harvest, this year I vowed to find new ways to prepare this amazing little vegetable so that I can enjoy it at mealtime as much as I do taking that first dirty bite in the garden!

A couple of days ago, I roasted radishes along with some potatoes and carrots and they were delicious!

radish pesto

They developed a wonderful nutty flavour and creamy texture that was a pleasent surprise.

Make a Pesto with the gorgeous radish tops blending them with some olive oil, parsley, garlic, plain yogurt, salt and pepper.

What a great little spread to add to your BBQed steak or sandwiches!

This, I think will be my favourite! A warm, cheesy dip made with radish tops and roots!

radish greens dip

Radish Green Dip

PREP 15 MIN TOTAL 25 MIN SERVES 4

*If you don’t have enough radish  greens, top up with spinach.

Ingredients

1 tbsp butter

1/2 cup finely chopped radishes

1/2 cup finely chopped red onion

1 garlic clove, minced

1 1/4 cups coarsely chopped radish greens

125 g cream cheese, cubed and softened

3/4 cup finely grated parmesan cheese, divided

1/4 cup sour cream

1/2 tsp pepper

Instructions

  • Position rack in centre of oven, then preheat to 400F. 

  • Melt butter in a medium frying pan over medium. Add radishes, onion and garlic. Cook until softened, 4 to 6 min. Add radish greens, stirring until wilted, 2 to 3 min. Transfer to a medium bowl.

  • Stir in cream cheese, 1/2 cup Parmesan, sour cream and pepper. Scrape into a small (2 1/2-cup) oven-safe baking dish and sprinkle with remaining 1/4 cup Parmesan.

  • Bake until dip starts to bubble around sides of dish, 10 to 12 min. Remove and let cool slightly before serving with halved radishes, veggies or crackers.

Make-Ahead Tip: Prep the day before and refrigerate. Reheat in a 400F oven until dip is warm, 16 to 18 min.

radish slices


This year, lets give the Radish the honour it deserves and elevate it to more than just a platter decoration or salad garnish!

It will be the first vegetable available at our market stand and I plan to grow more to enjoy throughout the season! Find out when you can get our radishes to try HERE

See you at the farm!